Create a Calculated Date Metric
A calculated date metric is a metric that is generated from a data source in BrightWork. The data source can be a list (an entire list, a view in a list or a list filtered by your own custom CAML), a BrightWork Reporter report, or the Project Cache.
Example: Time. This metric calculates the Project estimated Current Finish Date. It is also used to indicate if a project is late, in danger or on target. This metric is available in the Project Lite, Project Standard and Project Structured templates.
See Supplied Metrics for more metric examples.
To create a calculated date metric:
- Navigate to the Metrics list and click new item, then click Calculated Date Metric.
- Give the metric a Title and a Description.
-
If necessary, specify a new Metric ID.
The system will automatically generate a Metric ID for the metric using the title, but you may update to one that makes more sense to you.
If the Metric ID already exists in the list, you will see a message saying that 'the Metric ID is not available' when you attempt to save it or click the Check button. This means you will have to edit so that it is unique.
-
If necessary, unselect the Activate Metric check box to make the Metric inactive.
Making the Metric inactive does the following:
- Prevents data from this Metric appearing in reports where the Metric was added to join with the Project Statement
- Excludes the Metric from the Metric Recalculation Timer Job
-
Select a Category for the metric. The available options include:
- Cost
- Date
- Duration
- Project
- Quality
- Resource
- Scope
- Variance
- Work
- Choose Metric Data Source: List:
- Select the list.
-
Select the filter:
- All items
- Items in this view
- Specify filter (CAML)
Note: If the view has item limits enabled, the metric will only use the items returned.
If the items in the view are grouped into batches, the metric will use all the items returned by the view in all the batches.
-
Select the column to use for the Metric Calculation and the formula:
- Maximum (i.e. the latest date in the items returned)
- Minimum (i.e. the earliest date in the items returned)
- Select whether or not to automatically calculate the metric in the Metric Recalculation Timer Job.
-
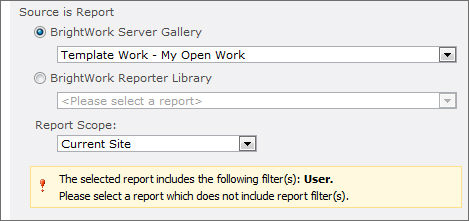
Select the Report.
Note: You must select a report which does not include report filter(s).
Reports that include report filters (e.g. My Work, Work Due Soon) are not supported as a Metric Data Source. Selecting such a report will cause a warning message to display and you will be unable to save the metric.
-
Select the Scope:
- Current Site
- Current Site and Subs
-
Select the column to use for the Metric Calculation and the formula:
- Maximum (i.e. the latest date in the items returned)
- Minimum (i.e. the earliest date in the items returned)
- Select whether or not to automatically calculate the metric in the Metrics Recalculation Timer Job.
-
Select the filter:
- Items in this view
- Specify filter (CAML)
Note: The metric will use all the items returned by the view even if the view has item limits enabled.
If the items in the view are grouped into batches, the metric will use all the items returned by the view in all the batches.
-
Select the Scope:
- Current Site
- Current Site and Subs
-
Select the column to use for the Metric Calculation and the formula:
- Maximum (i.e. the latest date in the items returned)
- Minimum (i.e. the earliest date in the items returned)
- Select whether or not to automatically calculate the metric in the Metric Recalculation Timer Job.
-
Select the filter:
- All items
- Items in this view
- Specify filter (CAML)
Note: The metric will use all the items returned by the view even if the view has item limits enabled.
If the items in the view are grouped into batches, the metric will use all the items returned by the view in all the batches.
-
Select the Scope:
- Current Site
- Current Site and Subs
-
Select the column to use for the Metric Calculation and the formula:
- Maximum (i.e. the latest date in the items returned)
- Minimum (i.e. the earliest date in the items returned)
- Select whether or not to automatically calculate the metric in the Metric Recalculation Timer Job.
-
Select the Metric Value Format:
- DateTime
- DateOnly
- Custom
-
Select the Metric Indicator Settings.
The Metric Indicator settings allow you compare the Metric value to a target and specify Warning and Danger parameters to trigger associated icons.
- Specify whether or not to show an indicator for the metric.
-
Specify the date to compare the metric to:
-
Select or enter a fixed date (and, if necessary, select a time)
or - Select another Date metric to use as the comparison date
-
Select or enter a fixed date (and, if necessary, select a time)
-
Specify whether earlier or later dates are better.
When Earlier dates are better is selected, any Metric date before the target will trigger the default green icon. A Metric date one day after the target value will trigger the Warning icon. A Metric date two or more days after the target value will trigger the Danger icon. In other words, the further away we move from a date in the past, the worse it is. This is the setting you will probably use in the majority of situations.
When Later dates are better is selected, any Metric date on or after the target will trigger the default green icon. A metric date one day before the target value will trigger the Warning icon. A metric date two or more days before the target value will trigger the Danger icon. In other words, the closer we get to a future date, the better it is and the further away from a future date, the worse it is.
-
Enter the number of days for the Warning and Danger thresholds.
Note: The number of days must be a whole number between 0 and 10000.
The Danger value must be greater than or equal to the Warning value.
- If desired, specify custom icon paths.
- Click Update.
Or Report:
Or
Project Cache:
Or
Work Cache: