About the Task Scheduler
The Task Scheduler allows you to apply simple scheduling to your task lists. You can use the scheduler to move and calculate the dates on multiple tasks and promote data from tasks to summary tasks and metrics. The scheduler is lightweight and easy to use and is not a direct substitute for Microsoft Project. If you need complex scheduling, using Microsoft Project alongside our Project Structured template is a fantastic way to take your schedule management to the next level.
Note: While it is possible to manage your task list in Microsoft Project Professional and the BrightWork task scheduler at the same time, it is not recommended.
Activate the task scheduler
The scheduler is enabled by default on newly created projects that use the Project Standard template. For templates like Project Lite that do not have the scheduler enabled out-of-the-box, or projects based on older templates, you need to enable scheduling.
Enabling the feature gives you Calculate and Move functionality, and allows you to configure certain parts of the scheduler for the list. There is also an Upgrade option to bring projects based on older templates, or projects using the Project Lite template, up to date to support scheduling.
To activate the scheduler for your task list:
- Navigate to your project's task list.
- Click List | List Settings in the ribbon.
- Click Task Scheduling (BrightWork).
- Check the Enable scheduling for this list checkbox.
- * Optional but recommended: Check the Upgrade this list to support scheduling checkbox to activate changes to your list and views which make scheduling easier.
- Click OK.
Once you have enabled scheduling - and optionally upgraded your list to support scheduling - you will be taken to the configure scheduling page where you can configure your scheduler.
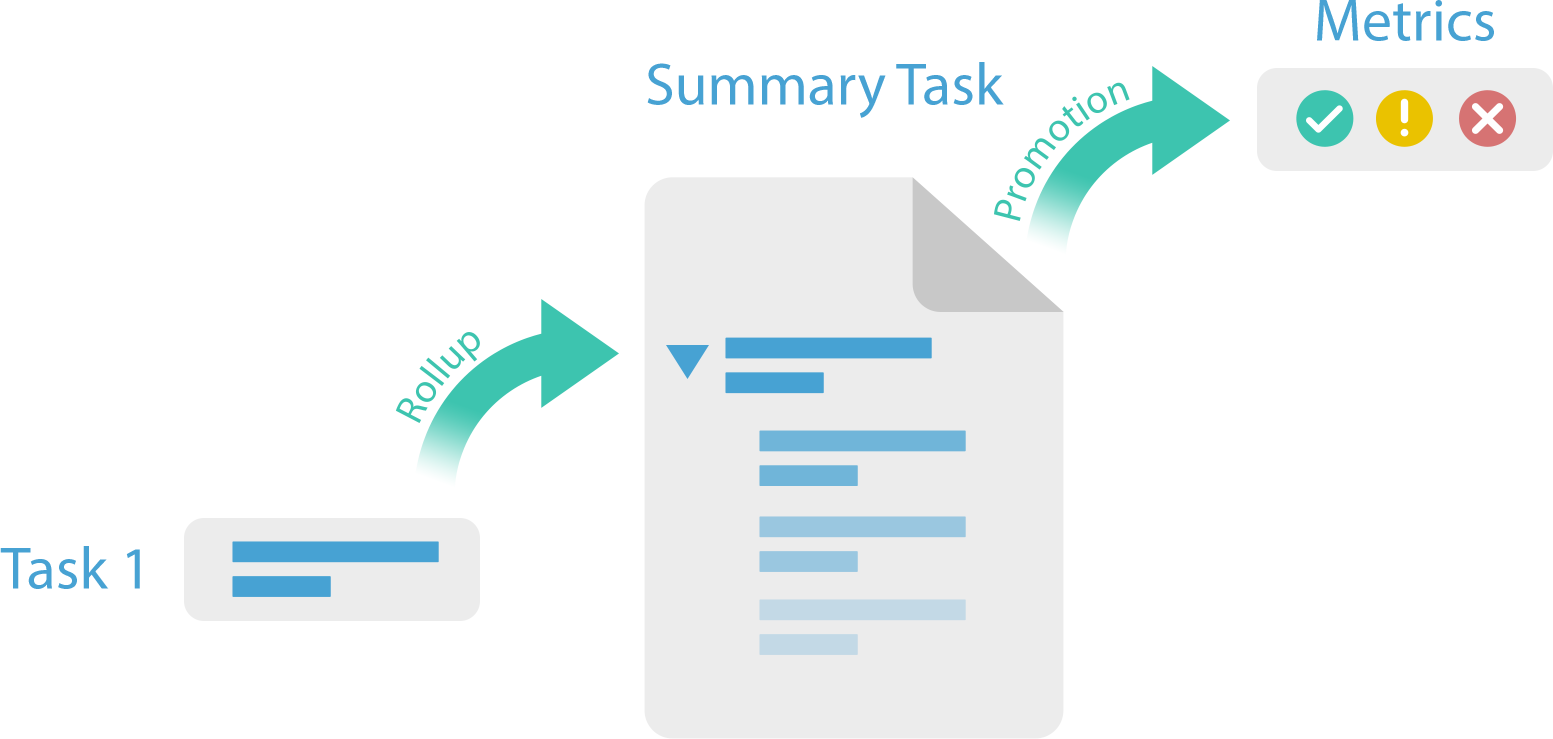
The scheduler can rollup columns to a summary task and can promote the rolled up information to metrics. You can then use these metrics in your Metric Tiles or Scorecards to keep an eye on your scheduled tasks.
Upgrade your list
Scheduling requires certain columns like Duration, Start Date, Finish Date and Predecessors to be enabled and visible in the list. Certain templates like Project Standard come with these ready out-of-the-box, but Project Lite and older templates do not. The Upgrade option automatically adds the columns you need to the list and re-creates your default views to show schedule-related information.
The upgrade makes the following changes to your list and views:
- Relevant column titles will change to more appropriate titles
- If available, the Duration, Remaining Duration and Actual Duration columns will be enabled and visible
- If the following views exist, they will be reset and have a new format:
- All Items
- Gantt Chart
- Active Tasks (Datasheet)
- All Tasks and Columns
- My Tasks
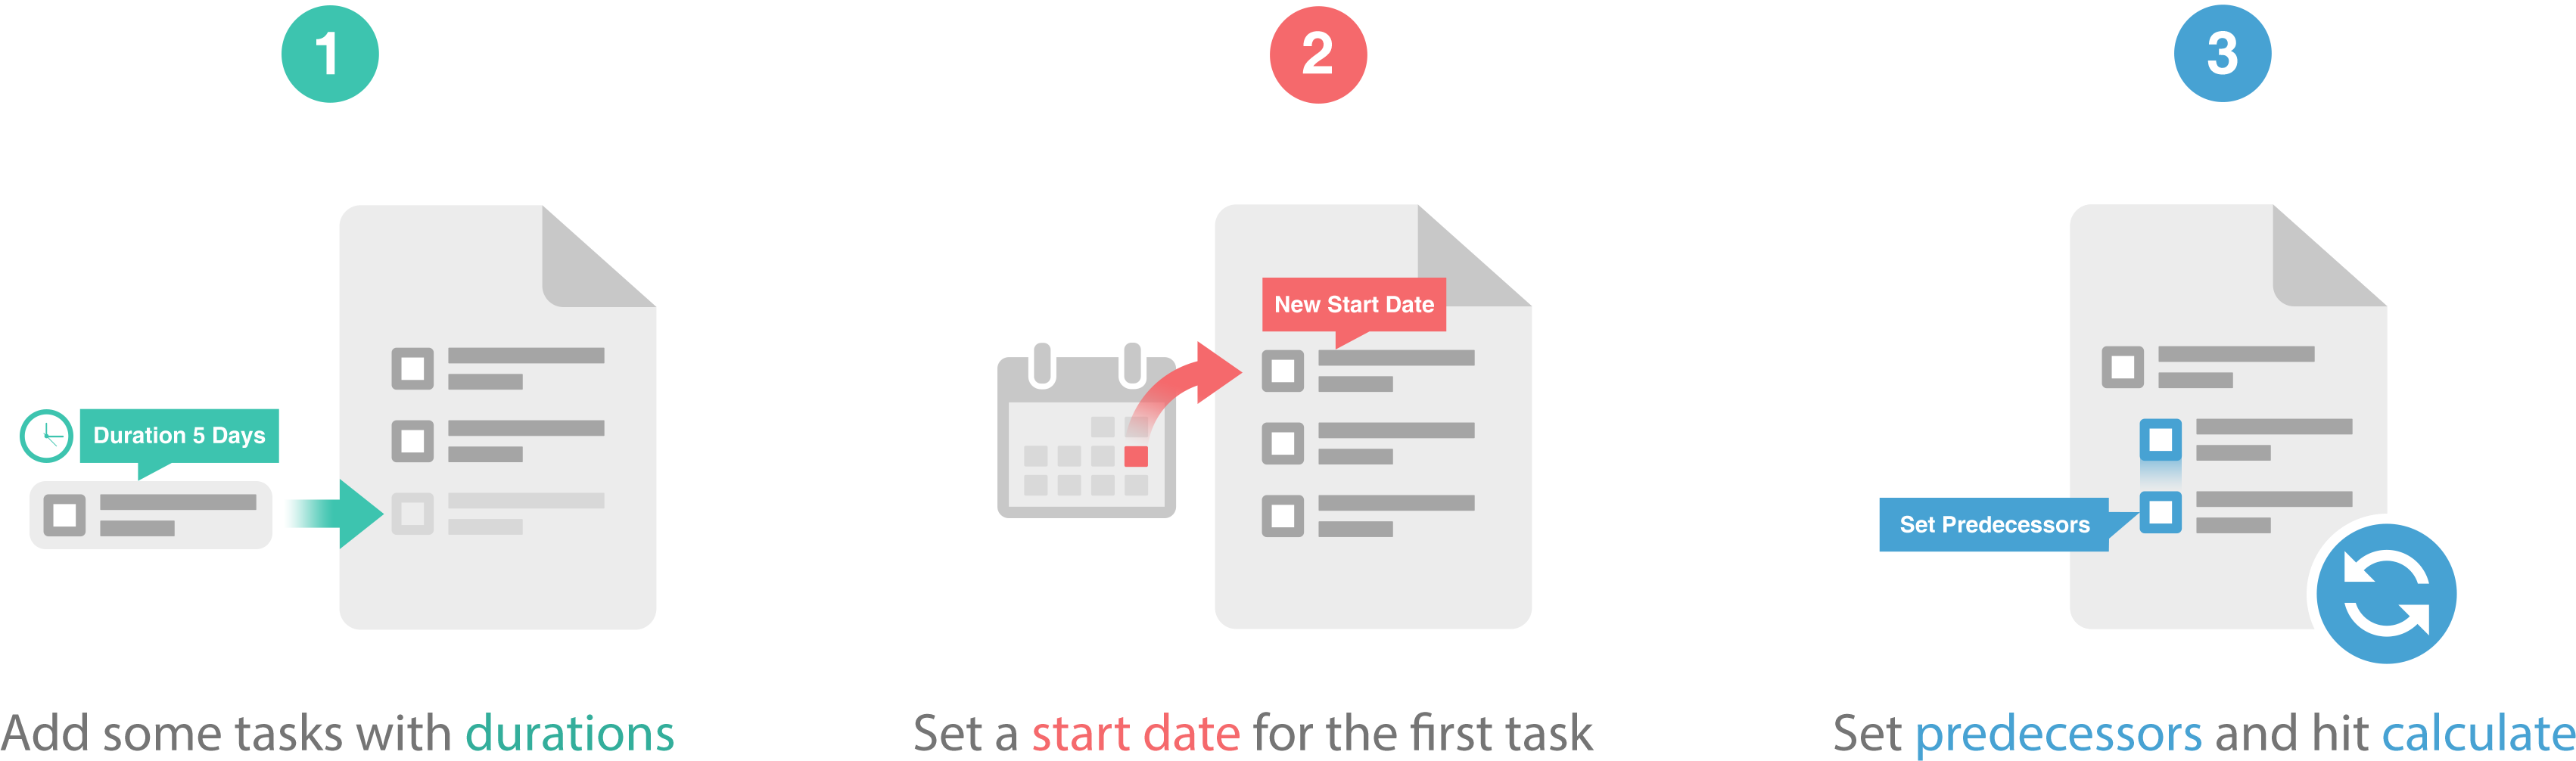
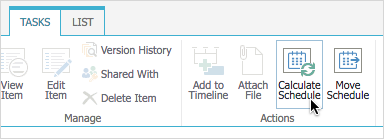
Calculate the schedule
In order to schedule your task list, the first task (at least) needs to have a Start Date, and subsequent tasks to have Predecessors defined. You can also have tasks with Start Date and a Finish Date or Duration and no predecessors. This means that if you assign Task 1 as the predecessor of Task 2, whenever you calculate, Task 2 will be adjusted relative to Task 1's calculated duration.
To calculate your schedule:
- Navigate to your task list.
- Click the Tasks Ribbon tab and click Calculate Schedule.
- Click OK.
Notes: If your task list contains circular references, for example, if Task 2 follows Task 1, which in turn follows Task 2, you will be notified that there is a circular reference or complexity problem.
Task dates will not move when a task list is recalculated if the dates are actual dates, i.e. the task has started or completed.
Move the schedule
Moving the schedule allows you to change all of the dates in your schedule to be calculated from a new starting position. This can be useful if you need to push out your tasks if the project will not start at the original time.
Tip! We don't recommend moving a schedule where tasks have already started, as they will have fixed dates that may produce an unexpected schedule result.
To move your schedule:
- Navigate to your task list.
- Click the Tasks Ribbon tab and click Move Schedule.
- Enter or select a new Start Date.
- Click OK.
Rollup a summary task
Summary tasks are a good way to group together several tasks for easy management. For example, you might want to group together tasks for the Initiate phase of your project.
In the task list, you can create a summary task using the indentation controls from the Tasks ribbon. These Hierarchy controls let you group tasks together by indenting them under a summary task.
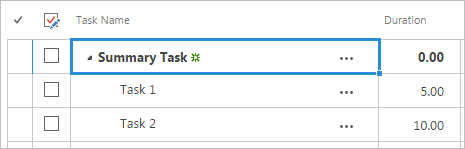
Data from tasks within the summary task can have their information rolled up to the summary task. Doing this allows you to report on just the top-level summary tasks and get information about its subtasks. For example, you might want to rollup the costs of each task, or the durations, or the % Complete values to simplify reporting.
To learn how to rollup a column to the summary task, please see the Configure Task Scheduling page.
Promote a metric
When you have rolled tasks up into summary tasks, you can then take the overall rollup values and promote them to a metric. For example, the actual cost of tasks can be rolled up to summary tasks and the overall cost promoted to the cost metric.
To learn how to promote a column to a metric, please see the Configure Task Scheduling page.
Refresh the schedule
The schedule can be refreshed and re-calculated by using the Calculate Schedule action found in the Tasks ribbon. You can also re-calculate the schedule by clicking the Refresh Project Data found in the Project Ribbon options.
Schedule and the calendar
Project calendars are tied to the individal project site, while the root calendar can be used as a standard calendar across the entire environment. You might use the root calendar if you want a standard holiday calendar for all projects and you might use the project calendar.
Only one calendar is supported for the task scheduler at this time. You can configure the calendar options for the project site by using the Project Settings page.
Tip! You can use the calendar in the project site, but keep the non-working days set by the root calendar. To do this, export the entries from the root calendar and import them into the project site calendar.
Tips for successful scheduling
Scheduling can be a tricky business if you're not careful. These are a few tips that should help you keep a clean and tidy schedule.
- Use a single task list to promote to metrics and perform calculated metric refreshes. Multiple task lists can produce unexpected results.
- Do not use Microsoft Project Professional and the BrightWork task scheduler at the same time on the same list. This can lead to unexpected time variations.
- Try and keep predecessor complexity low. This makes for a faster calculation and reduces the risk of circular references.
- Don't use summary tasks as predecessors. This is recognized best practice and will help you later when you are managing your schedule.