Export and Import List Data
About Export and Import
BrightWork provides an export and two import options that help get data quickly into BrightWork. You can export data from a list to XML format, filtering the items to include using a view. The resulting XML file can be imported into SharePoint lists. This is the recommended way to move data from one list to another list as it includes all the data in the items.
You can also import data from Microsoft Excel by selecting a XLSX formatted file. This is particularly useful if you are comfortable using Excel to capture items quickly, but need a more collaborative tool like BrightWork to share and individually track the items.
Import Data From Microsoft Excel
You can import the contents of a Microsoft Excel XLSX file into a BrightWork list. This streamlines the process of migrating data into lists.
- We recommend using a Microsoft Excel file containing one Sheet.
- The column names must be in the first row in the Microsoft Excel file.
- The column names must match the BrightWork list's column captions or internal column names.
- Imported data will be appended to the list.
Tip! To obtain a file with the proper column headings in place, you can use the Export to Excel function in List Settings to export list data using a specific view to filter the items exported, replace the cell data with your new values, and then save the file as an XLSX file ready to be imported.
To import data from Microsoft Excel:
-
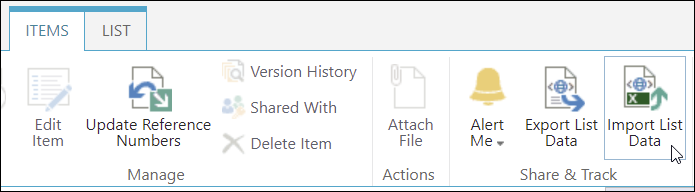
Click Items | Import List Data on the list ribbon.
- Click Browse and navigate to the location of the relevant file.
- Click Open.
- Optional: Select the Import Users checkbox to import users from the file.
- Click Import.
Column Support
| Title | Supported | Notes |
|---|---|---|
| Single line of text | Yes | Limited to the first 255 characters. |
| Multiple lines of text | Yes | Text formatting will not be copied. We recommend that Plain text type columns are used as these will maintain new lines created in Excel. |
| Choice | Yes |
Single or multiple value columns are supported. Multiple values are supported to facilitate Export to Excel from one list in order to import into another list. To manually separate values you need to use ;#. For example, Project;#Cost will import two values, Project and Cost.
Choice values are always imported, even if the value imported is not a valid choice. If this happens, when you edit the item, the imported Choice value will disappear. Choice columns are case sensitive which can be a common reason for unseen differences. Additional spaces in the Excel file is also a common reason for an unseen difference. To guard against this happening you need to ensure the values in the spreadsheet are identical to the choices in the Choice column. You can also enable "Allow 'Fill-in' choices" for the Choice column as this supports any value. Single value Choice columns are limited to the first 255 characters. |
| Number (1, 1.0, 100) | Yes | Will match the Number setting configured in the SharePoint site. |
| Currency ($, ¥, €) | Yes | Will match the Currency setting configured in the SharePoint site. |
| Date and Time | Yes | Will match the Date and Time setting configured in the SharePoint site. |
| Person or Group | Yes |
Users can be added to single or multiple value columns.
Users will be imported if the user name or email address in the Microsoft Excel file matches a user in the current site collection. Multiple values are supported to facilitate Export to Excel from one list in order to import into another list. To manually separate values you need to use ;#n;# where the number n used is either the ID of the user record in the site collection, or it can be a much simpler approach, where n is a unique number in the cell. For example, Anne Wallace;#1;#[email protected];#2;#Jim Corbin;#3 could be used to import Anne Wallace, Christine Chang, and Jim Corbin.
SharePoint Groups are not imported. |
| Lookup | No | |
| Yes/No | No | |
| Hyperlink or Picture | No |
Troubleshooting Excel Import
Issue 1: Rows at the end of an extremely large Excel file are not imported.
Reason: SharePoint has a default timeout of six minutes when running an Excel Import.
So, if an Excel file is being imported and it takes more than six minutes to complete then some rows will not be imported.
If this is the issue then the ULS log will contain the error: System.Web.HttpException: Request timed out.
Contact your SharePoint administrator if you have questions on the SharePoint ULS logs.
Issue 2: Some data or rows are missing after the Excel import.
Reason: Invalid data is not imported.
Approach: If you are having trouble determining why some data is not being imported,
the SharePoint ULS logs will contain a record of any errors found during the import.
Contact your SharePoint administrator if you have questions on the SharePoint ULS logs.
Export and Import XML List Data
You can export the contents of a BrightWork list (including attachments) to an XML file for importing into another BrightWork list. This streamlines the process of migrating data between lists and also enables the sharing of list data with SharePoint users outside of your organization.
Notes:
- Lookup items are not supported when importing a single list except when the lookup is to the same list.
- The original creation date and date last modified date are not retained.
- Users are imported if the user name used matches a user name in the current site collection, i.e. importing an exported XML file from another site collection may not result in users being imported.
- The list types or list names do not have to match; however data will only be imported where the column name and column type match exactly.
- List folder structures are not recreated on import - all the list items (including ones that were in folders) are imported in a flat structure.
- Export and Import of external lists is not supported.
Tip! You can export list data using a specific view to filter the items exported. This is particularly useful, for example, if you wish to export specific metrics from one project site and import them into another. To do this, you create or modify a view and set up the view filter to only include the metrics you want to move and select the view when exporting.
To export list data to XML:
-
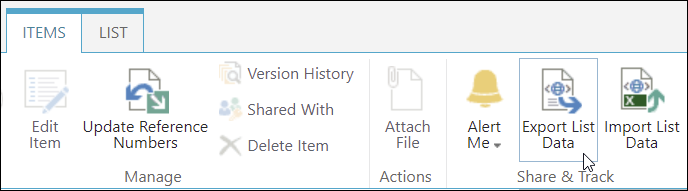
Click Items | Export List Data on the list ribbon.
- Select All items to export all items in the list, or select View filter and pick a view to export from the drop down.
- Click Export and save the XML file to a suitable location.
- Click Close.
Note: Selecting a view will limit the items from the list which are exported, but not the columns. All columns are always exported.
To import XML list data:
- Click Items | Import List Data on the list ribbon.
- Click Browse and navigate to the location the XML file is stored in.
- Click Open.
- Optional: Select the Import Users checkbox to import users from the XML.
- Click Import.