Create a Manual Date Metric
A manual date metric is a date-based metric that you update yourself. The data for the metric may come from outside the project or you may create a manual date metric to act as a target value for other metrics.
Example: Customer Required Date. This is an external fixed date that comes from outside the project. This metric is included in the Project Structured template.
See Supplied Metrics for more metric examples.
Tip! If you make a mistake adding a metric, click Version History and Delete the metric. You can then create a new metric and use the Apply Metric Value To option to put the fixed metric back in position.
To create a manual date metric:
- Navigate to the Metrics list and click new item, then click Manual Date Metric.
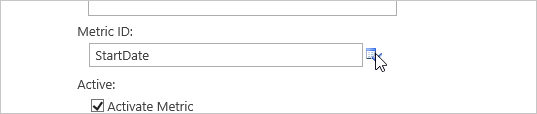
- Give the metric a Title and a Description.
- If necessary, specify a new Metric ID.
The system will automatically generate a Metric ID for the metric using the title, but you may update to one that makes more sense to you.
If the Metric ID already exists in the list, you will see a message saying that 'the Metric ID is not available' when you attempt to save it or click the Check button. This means you will have to edit so that it is unique.
- If necessary, unselect the Activate Metric check box to make the Metric inactive.
Making the Metric inactive does the following:
- Prevents data from this Metric appearing in reports where the Metric was added to join with the Project Statement
- Excludes the Metric from the Metric Recalculation Timer Job
- Select a Category for the metric.
The available options include:
- Cost
- Date
- Duration
- Project
- Quality
- Resource
- Scope
- Variance
- Work
- Select or enter the Metric Date Value if it is relevant, and if the Metric Value Format includes time.
- Optional: If you want the metric to be applied to a past date, enter a date in the Apply Date Value section. If you leave this value blank, then today's date will be used. Example: Your Target Release Date for a project in February is October 31st. This release date then changes on the last day of March as the project scope extends, and now the Target Release Date moves to December 31st. If the metric was not updated in March on time, you can use the Apply Date Value to set the date even if you are no longer in March.
- Select the Metric Value Format.
- Date Time
- Date Only
If you select Date Only, time will not be used in the metric display and indicator calculation.
- Custom
- Select the Metric Indicator Settings.
The Metric Indicator setting allows you compare the Metric value to a target and specify Warning and Danger parameters to trigger associated icons.
Select:
- Whether or not to show an indicator for the metric.
- Specify the date to compare the metric to:
- Select or enter a fixed date (and, if necessary, select a time)
or - Select another Date metric to use as the comparison date
- Select or enter a fixed date (and, if necessary, select a time)
- Specify whether earlier or later date are better.
When Earlier dates are better is selected , any Metric date before the target will trigger the default green icon. A Metric date one day after the target value will trigger the Warning icon. A Metric date two or more days after the target value will trigger the Danger icon. In other words, the further away we move from a date in the past, the worse it is. This is the setting you will probably use in the majority of situations.
When Later dates are better items is selected, any Metric date on or after the target will trigger the default green icon. A metric date one day before the target value will trigger the Warning icon. A metric date two or more days before the target value will trigger the Danger icon. In other words, the closer we get to a future date, the better it is and the further away from a future date, the worse it is.
- Enter the number of days for the Warning and Danger thresholds.
Note: The number of days must be a whole number between 0 and 10000.
The Danger value must be greater than or equal to the Warning value.
- If desired, specify custom icon paths.
- Click Update.