Upgrade BrightWork
This article describes how to upgrade BrightWork for SharePoint 2016 from a previous version of BrightWork for SharePoint 2016.
Part of this process involves uninstalling the BrightWork solution before installing the newer version. This process does not affect your data or customizations.
At a high-level the sequence of steps are as follows:
- Pre-Requisites
- Uninstall BrightWork
- Install BrightWork
- Update Servers
- Activate BrightWork Timer Jobs
- Adjust BrightWork Timer Jobs
- Run psconfig
Pre-Requisites
- You need administrative privileges on your SharePoint server to install BrightWork.
- While installing, you need full control access to the SQL Admin Content Database.
- We recommend you create a full backup of your SharePoint installation before starting the installation.
- .NET Framework 4.7.2 is the minimum version of the .NET Framework required to install BrightWork 16.26 and above. To determine the current installed version of the .NET Framework, see Microsoft | How to determine which versions are installed. The .NET Framework can be downloaded here: Microsoft | Download .NET Framework.
Uninstall BrightWork
Tip! If you have made changes to your BrightWork timer jobs, you should take note of these settings so you will be able to restore them later.
To uninstall BrightWork:
-
Right-click on the SharePoint 2016 Management Shell and select Run as administrator.
-
Run this command:
cd "C:\Program Files (x86)\BrightWork\16\Install Files" -
Run this command:
.\UnInstallSolution.ps1 BrightWork.wsp -
When the "Solution BrightWork.wsp is now removed" message displays, close the SharePoint Management Shell.

- Navigate to the Control Panel | Programs and Features page.
- Click on BrightWork for SharePoint 2016 and click Uninstall.
Note: If you experience a long delay, seeing Deployment Status: Scheduled, it may relate to a known issue with timer jobs. See this Microsoft article, Administrative Timer Jobs not running after upgrade, for details. This article also applies to later versions of SharePoint.
Install BrightWork
Note: If installing BrightWork in an environment with SharePoint side-by-side upgrade functionality enabled, follow these steps:
- After the installation step to run the command
Install-SPApplicationContent, runCopy-SPSideBySideFileson all servers. - Perform an IISReset.
- Copy the BrightWork installer to your server desktop and double-click on it to begin the installation.
- Click Next.
- Review the License Agreement, select I Accept and click Next.
- Click Install, then click Finish.
- Right-click on the SharePoint 2016 Management Shell and select Run as administrator.
-
Run this command to change to the install files folder:
cd "C:\Program Files (x86)\BrightWork\16\Install Files" -
Next, run this command:
.\InstallSolution.ps1 "C:\Program Files (x86)\BrightWork\16\Install Files\BrightWork.wsp" -
Close the SharePoint Management Shell when "Solution BrightWork.wsp is now installed" displays.
Note: Please ensure you close the SharePoint Management Shell before proceeding with the next step. This ensures that it is running under a different process.
-
Right-click on the SharePoint 2016 Management Shell, click Run as administrator and run this command:
Install-BWDiagnosticsService - Close the SharePoint Management Shell.
Update Other Servers in the Farm
Follow the steps below on all other servers in the farm.
- Right-click on the SharePoint 2016 Management Shell and click Run as administrator.
-
Run the following commands (in sequence) on each front end server the solution has been deployed to:
iisresetnet stop sptimerv4net start sptimerv4Install-SPApplicationContent - Close the SharePoint Management Shell.
- Right-click on the SharePoint 2016 Management Shell and click Run as administrator.
-
Run the following command:
Install-BWDiagnosticsService
Activate BrightWork Timer Job Features
- Login to SharePoint Central Administration.
- Click Manage web applications.
-
Ensure you have the correct web application selected and click Manage Features.
Note: The timer job features must be activated on a web application by web application basis.
-
Click Activate beside the following timer jobs:
- BrightWork Metric Recalculation Timer Job
- BrightWork Project Cache Maintenance Timer Job
- BrightWork Project Status Report Cache Maintenance Timer Job
- BrightWork Scheduled Email Timer Job
- BrightWork Task Scheduling Timer Job
- BrightWork User Access Report Timer Job
- BrightWork Work Cache Maintenance Timer Job
- Click OK.
Adjust BrightWork Timer Job
If you have previously adjusted your BrightWork Timer Jobs, you need to do so again to reapply your changes.
The main timer jobs should run at least once a day in the following sequence:
- User Access Report (Monthly - default is the 1st of the month at 12:00am)
- Task Scheduling (Daily - default time 12:00am to 12:30am)
- Project Metrics Refresh (Daily - default time 1:30am to 2:00am)
- Project Status Report Cache Refresh (Daily - default time 2:30am to 3:00am)
- Project Cache Refresh (Daily - default time 3:00am to 3:30am)
- Work Cache Refresh (Daily - default time 3:30am to 4:30am)
- Scheduled Email (Daily - default time 4:30am to 5:00am)
- Work Cache Update (Daily - runs every 15 minutes)
Tip! The User Access Report may not be needed very often. It might for instance be needed once a year for a user audit. In this case it is recommended to Disable the timer job when it is not needed and Enable it and select Run Now to create a report on demand.
To ensure projects metrics are up to date, the Project Metrics Refresh can be run as frequent as you like. At BrightWork we run the Project Metrics Refresh every 15 minutes.
Project Schedule Refresh timer job takes place from 12.00am to 12.30am. This is a timer job for a deprecated list. Therefore, if you do not use it, you do not have to use this timer job.
To adjust the timer job schedule:
- Click Monitoring on the Central Administration Quick Launch.
- Click Review job definitions.
- Click the BrightWork timer job you want to adjust.
- Make your adjustments and click OK.
Run psconfig
Note: Running the psconfig command may NOT be required when upgrading to the BrightWork 16.26.1 release. If you are upgrading from BrightWork 16.15 or later, then you do NOT need to run the psconfig command.
If you are upgrading from BrightWork 16.14 or earlier then you DO need to run the psconfig command.
In a multi-server SharePoint farm, psconfig needs to only run once on the Application server.
The SharePoint Products Configuration Wizard (psconfig) is a SharePoint Utility that needs to be run periodically for proper SharePoint maintenance. It is needed in BrightWork to update existing Site Collections with new features added in a release.
Please note that the psconfig utility can highlight issues with the configuration of your SharePoint Server Farm.
To run psconfig:
- Right-click on the SharePoint 2016 Management Shell and click Run as administrator.
-
Next, run the following command to perform a build-to-build upgrade using the SharePoint psconfig.exe utility:
psconfig.exe -cmd upgrade -inplace b2b -force -includesiteupgrade -
The below screen should display.
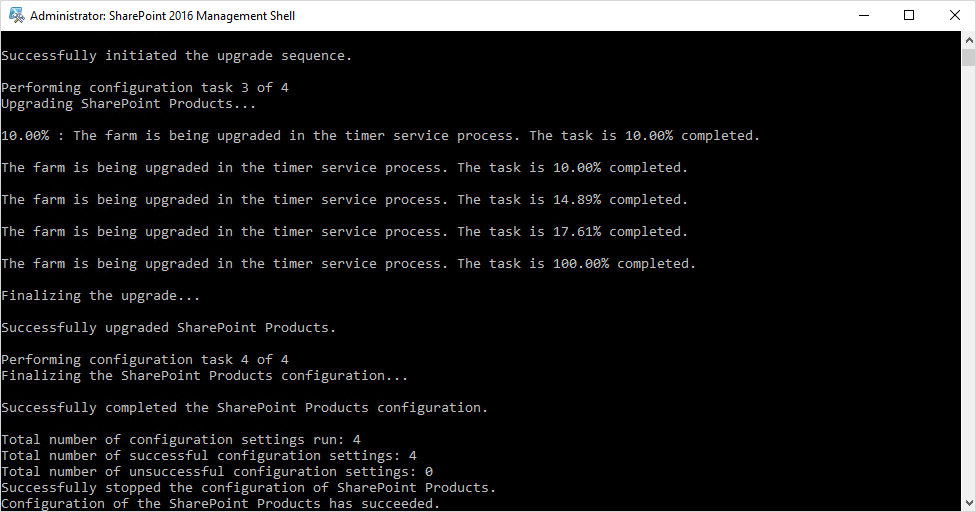
- Run
iisresetand close the window once "Internet services successfully restarted" is displayed.
BrightWork should be successfully upgraded.
Note: As of BrightWork 16.0, we no longer ship non-English versions of BrightWork directly. Language translations may be purchased through our partners however. For more information, please see the BrightWork Language Partners. Please contact [email protected] if you have any questions.